Play Helldivers 2 remotely with Moonlight and USB/IP project
The anti-cheating mechanism prevents us from streaming the game, but that can't stop us at all.
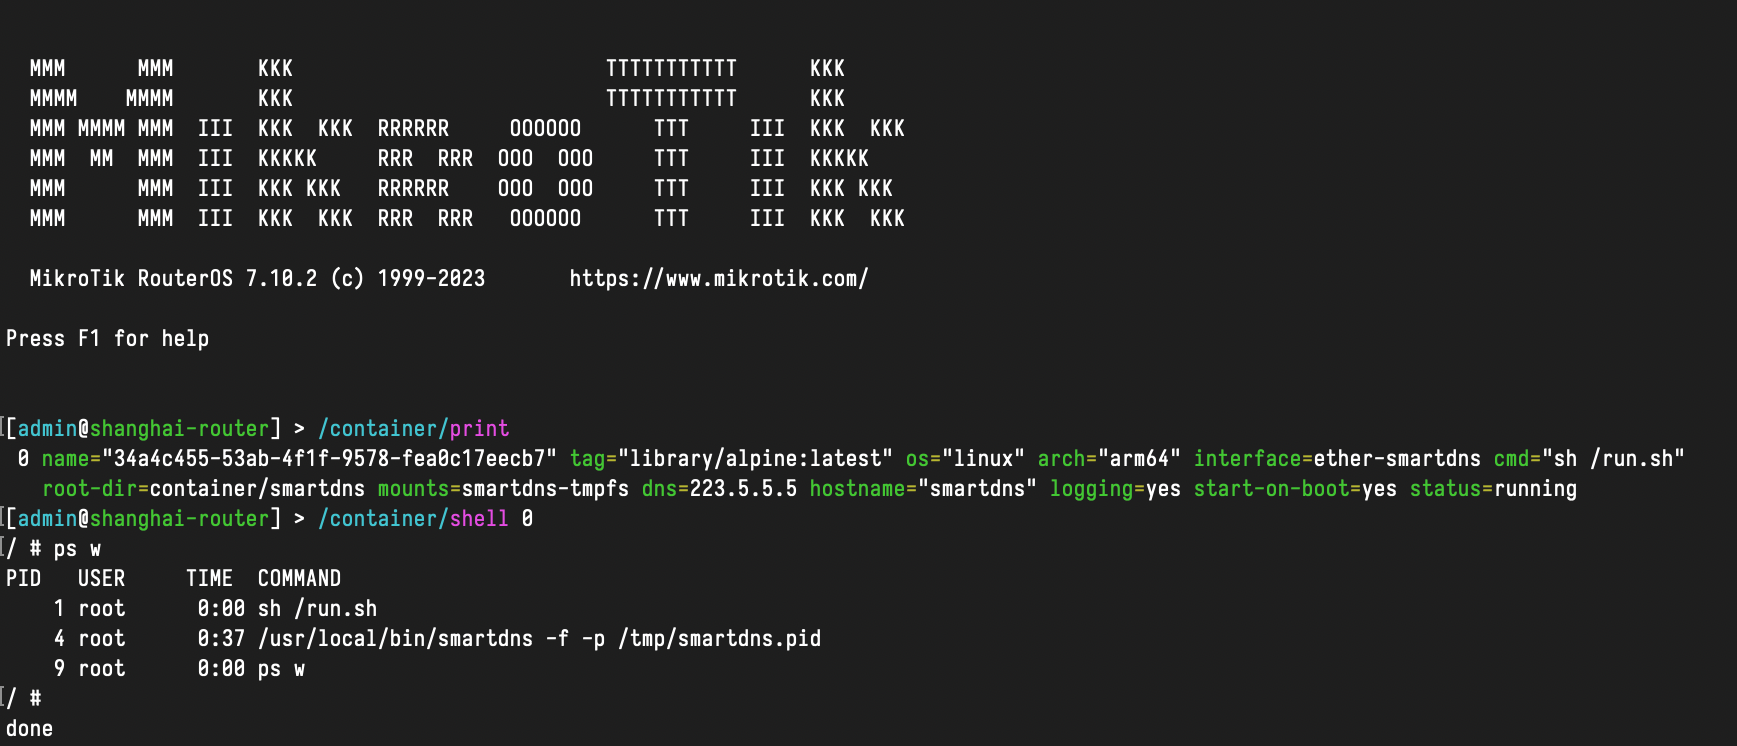
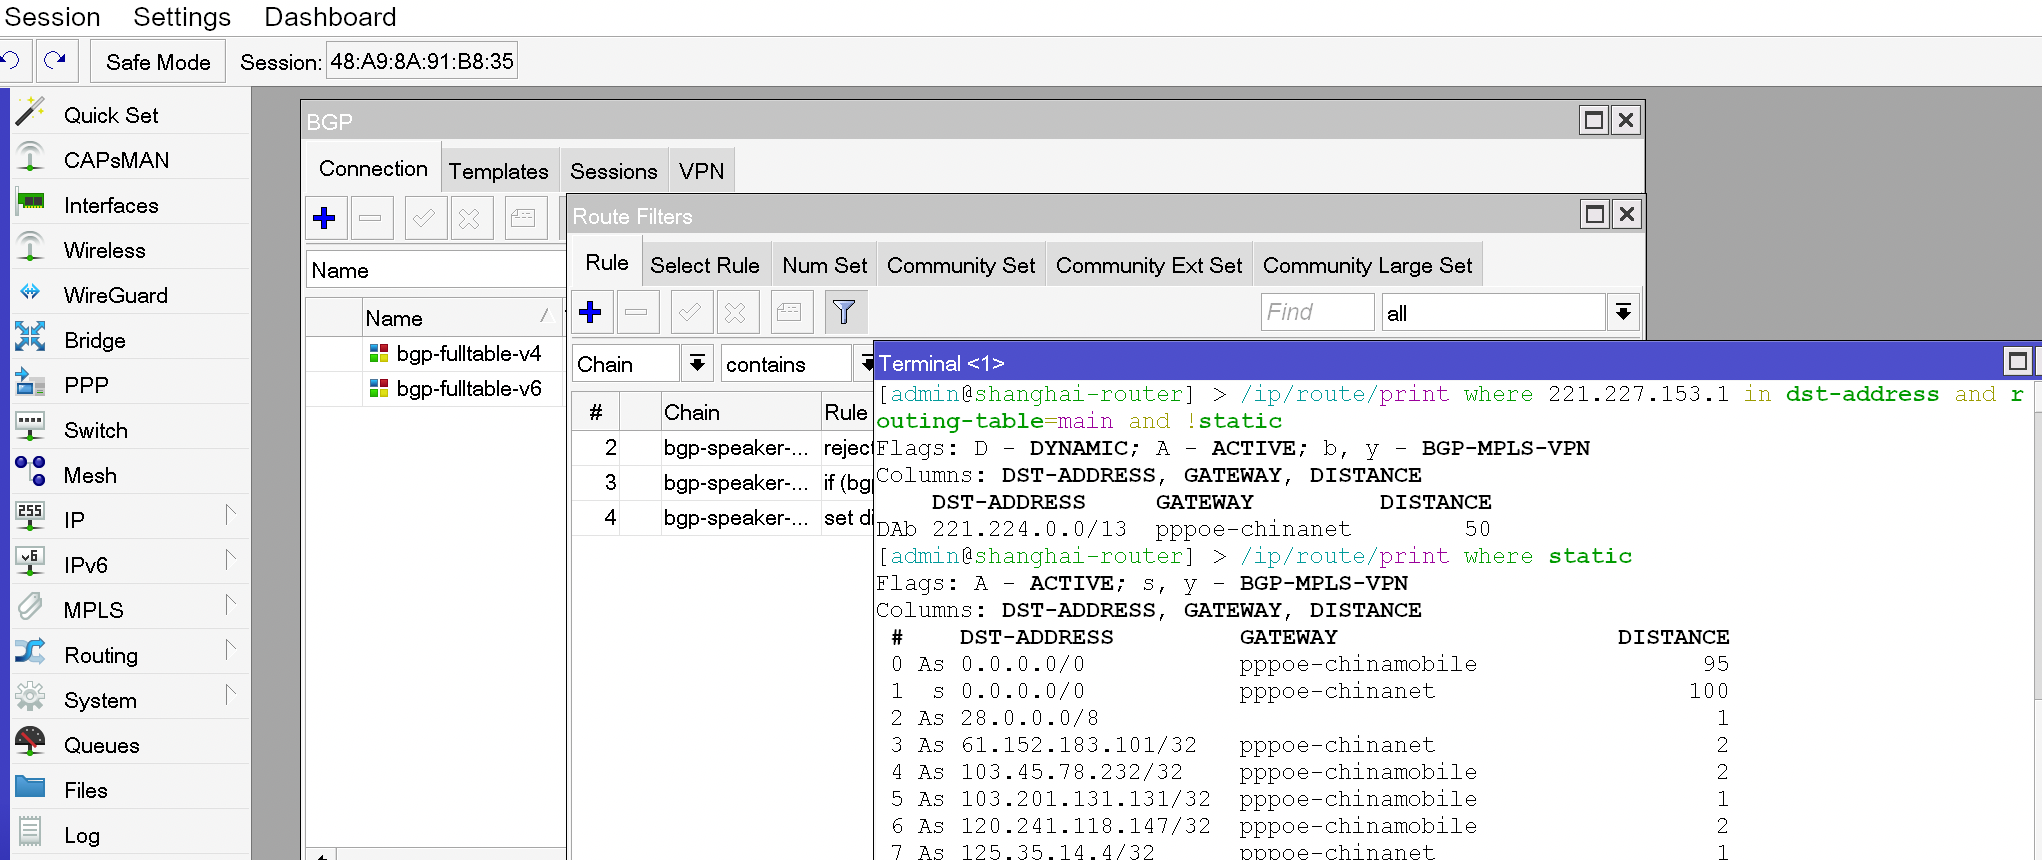
Use SmartDNS as DNS Server on RouterOS
A "featureful" local DNS server
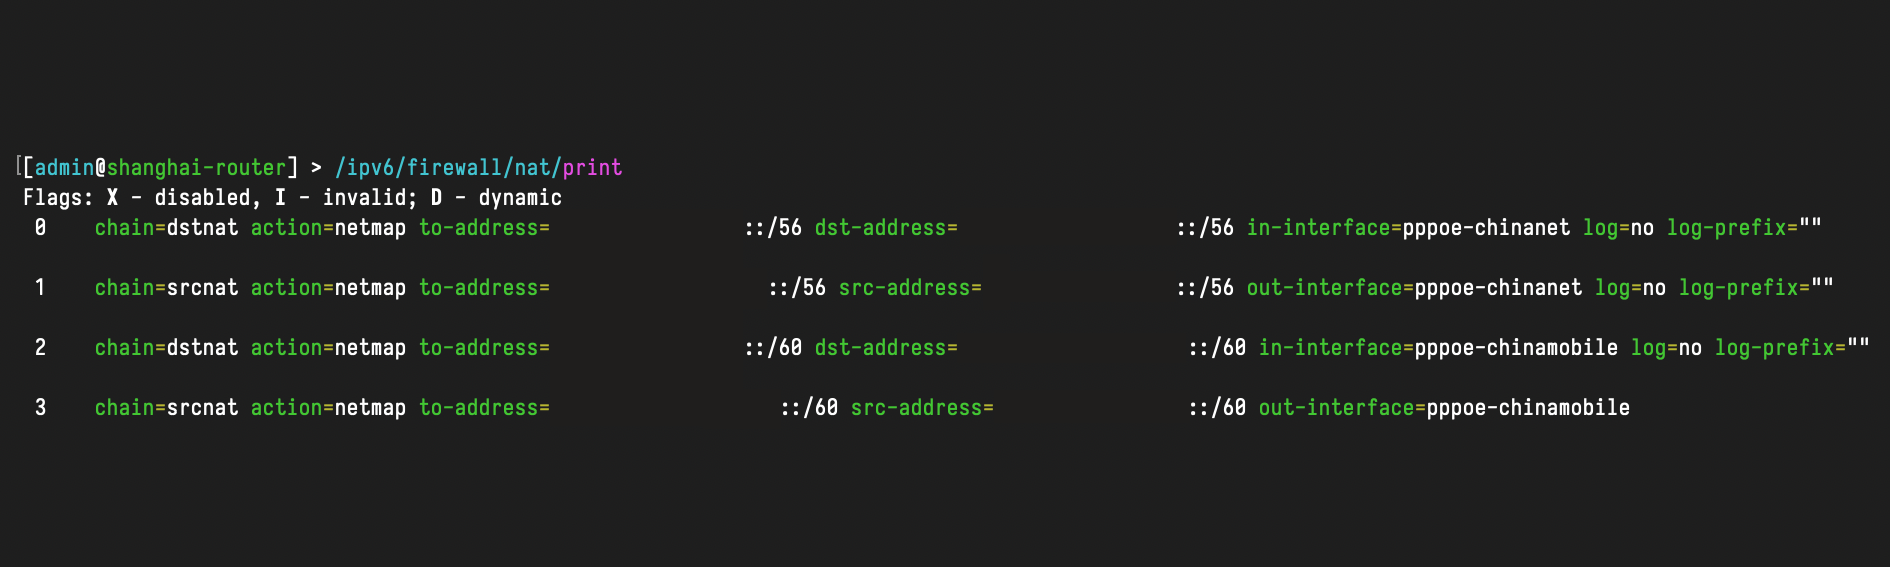
Using NETMAP to obtain persistent IPv6 addresses and control source address
IPv6 does indeed not require NAT, but prefix translation is not entirely useless.
Use Nix as Package Manager in macOS
A package management tool better than Homebrew (in my opinion)