Recently, within the small team at my company, I conducted a sharing session on WebAssembly, a technology that isn’t exactly trending but also isn’t very popular. I roughly discussed the development processes of asm.js and WebAssembly and, using the code from the famous “Ray Tracing in One Weekend”, I demonstrated the relatively superior performance of WebAssembly (superior, of course, compared to JavaScript, which is rather unimpressive). I myself had previously played around with a small experiment running CoreMark on WebAssembly, which can brute-force a CPU performance benchmark, but I haven’t recorded the details of the process that I went through. So, I’m considering writing a document to record it all , just in case I have to start over from scratch in the future.
Installing Emscripten
Emscripten is a toolchain for WebAssembly, which we need to install manually. The process isn’t complicated; you can check the official documentation for detailed installation instructions. In short, we just need to execute the following commands to complete the installation and activation:
1
2
3
4
5
|
git clone https://github.com/emscripten-core/emsdk.git
cd emsdk
./emsdk install latest
./emsdk activate latest
source ./emsdk_env.sh
|
It’s clear that this installation method will only work in the current shell session. If needed, you can add source ./emsdk_env.sh to the shell’s initialization script, which I won’t elaborate on here.
Getting and Modifying the Source Code of “Ray Tracing in One Weekend”
This is a fairly well-known introductory book on ray tracing, which can be read via this link: Ray Tracing in One Weekend. You can also find the final implemented code in the source repository of the book. For our purposes, I will use the provided sample answer directly rather than starting from scratch.
Compiling the original code directly into WebAssembly would certainly work, but I’m planning to do some optimization:
- The final implemented code’s method of outputting images is to print PPM to
std::cout. We can change this to allocate a bitmap directly in WASM’s memory and update it;
- The final implemented code’s progress output method is to use
std::clog to output Scanlines remaining: xx. We can change this to calling a JavaScript function that outputs progress to the JavaScript console and draws the aforementioned bitmap onto a canvas, allowing everyone to directly see the progress.
First, let’s deal with camera.h, where I added a definition for extern void report_number(number);. The specific implementation will be supplemented in JavaScript later to achieve the second point of optimization mentioned above.
 1
 2
 3
 4
 5
 6
 7
 8
 9
10
11
12
13
14
15
16
17
18
19
20
21
22
23
24
25
26
27
28
29
30
31
32
33
34
35
36
37
38
39
40
41
42
43
44
45
46
47
48
49
50
51
52
53
54
55
56
57
58
59
60
61
62
|
@@ -17,16 +17,18 @@
 #include "hittable.h"
 #include "material.h"

-#include <iostream>
-
+extern void report_number(int);

 class camera {
   public:
     double aspect_ratio      = 1.0;  // Ratio of image width over height
     int    image_width       = 100;  // Rendered image width in pixel count
+    int    image_height;             // Rendered image height
     int    samples_per_pixel = 10;   // Count of random samples for each pixel
     int    max_depth         = 10;   // Maximum number of ray bounces into scene

+    uint8_t *image_buffer = nullptr; // Bitmap for rendered image.
+
     double vfov     = 90;              // Vertical view angle (field of view)
     point3 lookfrom = point3(0,0,-1);  // Point camera is looking from
     point3 lookat   = point3(0,0,0);   // Point camera is looking at
@@ -37,26 +39,25 @@ class camera {

     void render(const hittable& world) {
         initialize();
-
-        std::cout << "P3\n" << image_width << ' ' << image_height << "\n255\n";
+        auto p = this->image_buffer;

         for (int j = 0; j < image_height; ++j) {
-            std::clog << "\rScanlines remaining: " << (image_height - j) << ' ' << std::flush;
+            if (j % 10 == 0)
+              report_number(image_height - j);
+            // std::clog << "\rScanlines remaining: " << (image_height - j) << ' ' << std::flush;
             for (int i = 0; i < image_width; ++i) {
                 color pixel_color(0,0,0);
                 for (int sample = 0; syyample < samples_per_pixel; ++sample) {
                     ray r = get_ray(i, j);
                     pixel_color += ray_color(r, max_depth, world);
                 }
-                write_color(std::cout, pixel_color, samples_per_pixel);
+                write_color(pixel_color, samples_per_pixel, p);
+                p += 4;
             }
         }
-
-        std::clog << "\rDone.                 \n";
     }

   private:
-    int    image_height;    // Rendered image height
     point3 center;          // Camera center
     point3 pixel00_loc;     // Location of pixel 0, 0
     vec3   pixel_delta_u;   // Offset to pixel to the right
@@ -68,6 +69,7 @@ class camera {
     void initialize() {
         image_height = static_cast<int>(image_width / aspect_ratio);
         image_height = (image_height < 1) ? 1 : image_height;
+        this->image_buffer = new uint8_t[image_height * image_width * 4];

         center = lookfrom;
|
And for color.h, which is responsible for handling colors:
 1
 2
 3
 4
 5
 6
 7
 8
 9
10
11
12
13
14
15
16
17
18
19
20
21
22
23
24
25
26
27
28
29
30
31
32
33
|
@@ -13,8 +13,6 @@

 #include "vec3.h"

-#include <iostream>
-
 using color = vec3;

 inline double linear_to_gamma(double linear_component)
@@ -22,7 +20,7 @@ inline double linear_to_gamma(double linear_component)
     return sqrt(linear_component);
 }

-void write_color(std::ostream &out, color pixel_color, int samples_per_pixel) {
+void write_color(color pixel_color, int samples_per_pixel, uint8_t *buffer) {
     auto r = pixel_color.x();
     auto g = pixel_color.y();
     auto b = pixel_color.z();
@@ -40,9 +38,11 @@ void write_color(std::ostream &out, color pixel_color, int samples_per_pixel) {

     // Write the translated [0,255] value of each color component.
     static const interval intensity(0.000, 0.999);
-    out << static_cast<int>(256 * intensity.clamp(r)) << ' '
-        << static_cast<int>(256 * intensity.clamp(g)) << ' '
-        << static_cast<int>(256 * intensity.clamp(b)) << '\n';
+
+    *(buffer + 0) = static_cast<int>(256 * intensity.clamp(r));
+    *(buffer + 1) = static_cast<int>(256 * intensity.clamp(g));
+    *(buffer + 2) = static_cast<int>(256 * intensity.clamp(b));
+    *(buffer + 3) = 255;
 }
|
Finally, we will make some modifications to the entry file main.cc, adding a few functions for JavaScript to obtain some parameters of the canvas, and we also renamed the main function:
 1
 2
 3
 4
 5
 6
 7
 8
 9
10
11
12
13
14
15
16
17
18
19
20
21
22
23
24
25
26
27
28
29
30
31
32
33
34
35
36
37
38
39
40
41
42
43
44
45
46
47
48
49
|
@@ -9,6 +9,7 @@
 // along with this software. If not, see <http://creativecommons.org/publicdomain/zero/1.0/>.
 //==============================================================================================

+#include <emscripten.h>
 #include "rtweekend.h"

 #include "camera.h"
@@ -17,8 +18,24 @@
 #include "material.h"
 #include "sphere.h"

+camera& get_camera() {
+  static camera cam;
+  return cam;
+}
+
+EMSCRIPTEN_KEEPALIVE int get_height() {
+  return get_camera().image_height;
+}
+
+EMSCRIPTEN_KEEPALIVE int get_width() {
+  return get_camera().image_width;
+}
+
+EMSCRIPTEN_KEEPALIVE uint8_t* get_buffer() {
+  return get_camera().image_buffer;
+}

-int main() {
+EMSCRIPTEN_KEEPALIVE int run() {
     hittable_list world;

     auto ground_material = make_shared<lambertian>(color(0.5, 0.5, 0.5));
@@ -61,7 +78,7 @@ int main() {
     auto material3 = make_shared<metal>(color(0.7, 0.6, 0.5), 0.0);
     world.add(make_shared<sphere>(point3(4, 1, 0), 1.0, material3));

-    camera cam;
+    camera& cam = get_camera();

     cam.aspect_ratio      = 16.0 / 9.0;
     cam.image_width       = 1200;
@@ -77,4 +94,5 @@ int main() {
     cam.focus_dist    = 10.0;

     cam.render(world);
+    return 0;
 }
|
After completing these changes, we should be able to compile the code into a wasm binary!
1
2
3
|
$ emcc -o hello.wasm main.cc -Wall --no-entry -s ERROR_ON_UNDEFINED_SYMBOLS=0 -O3
$ file main.wasm
main.wasm: WebAssembly (wasm) binary module version 0x1 (MVP)
|
With that, all the work related to the “native” side has been completed.
Writing JavaScript Glue Code
As is well-known, WebAssembly code cannot be directly executed by browsers, hence we need to prepare some “glue” code to load the wasm file and provide the necessary external definition functions:
 1
 2
 3
 4
 5
 6
 7
 8
 9
10
11
12
13
14
15
16
17
18
19
20
21
22
23
24
25
26
27
28
29
30
31
32
33
34
35
36
37
38
39
40
41
42
43
44
45
46
47
48
|
WebAssembly.instantiateStreaming(fetch("main.wasm"), {
  env: {
    _Z13report_numberi: function (num) {
      console.log(`report_number called: ${num}`);
      const resultAddress = results.instance.exports._Z10get_bufferv();
      const width = results.instance.exports._Z9get_widthv();
      const height = results.instance.exports._Z10get_heightv();

      const memoryView = new Uint8ClampedArray(results.instance.exports.memory.buffer, resultAddress, width * height * 4)
      postMessage({
        kind: 'IMAGE_DATA',
        width,
        height,
        memoryView,
      })
    }
  },
  wasi_snapshot_preview1: {
    clock_res_get: function () { console.info('warning: clock_res_get called, function not implemented'); return 0 },
    clock_time_get: function () { console.info('warning: clock_time_get called, function not implemented'); return 0 },
    fd_write: function () { console.info('warning: fd_write called, function not implemented'); return 0 },
    fd_read: function () { console.info('warning: fd_read called, function not implemented'); return 0 },
    fd_close: function () { console.info('warning: fd_close called, function not implemented'); return 0 },
    fd_seek: function () { console.info('warning: fd_seek called, function not implemented'); return 0 },
    proc_exit: function () { console.info('warning: proc_exit called, function not implemented'); return },
    fd_fdstat_get: function () { console.info('warning: fd_fdstat_get called, function not implemented'); return 0 },
  }
}).then(
    (results) => {
      globalThis.results = results;

      console.time('wasm code')
      results.instance.exports._Z3runv();
      console.timeEnd('wasm code')

      const resultAddress = results.instance.exports._Z10get_bufferv();
      const width = results.instance.exports._Z9get_widthv();
      const height = results.instance.exports._Z10get_heightv();

      const memoryView = new Uint8ClampedArray(results.instance.exports.memory.buffer, resultAddress, width * height * 4)
      postMessage({
        kind: 'IMAGE_DATA',
        width,
        height,
        memoryView,
      })
    },
  );
|
In the wasi_snapshot_preview1, I input many functions required by the C runtime. Because I was very certain that the code wouldn’t use these functions, I just filled it with a bunch of garbage. Also, in the env, I added a function _Z13report_numberi. The logic it executes is to obtain the canvas’s width and height from various C functions and arguments, and pass the drawing result back to our UI thread via the postMessage function. Since the execution of WebAssembly will also block other codes, it’s clear that this piece of JavaScript code is executed in a worker.
Finally, we just need to prepare an entry HTML file, and we are all done.
 1
 2
 3
 4
 5
 6
 7
 8
 9
10
11
12
13
14
15
16
17
18
19
20
21
22
|
<!DOCTYPE html>
<html>
  <head>
    <meta charset="utf-8" />
  </head>
  <body>
    <canvas width="256" height="256" style="width: 256; height: 256;"></canvas>
    <script>
    const worker = new Worker("worker.js");
    worker.onmessage = (e) => {
      if (e.data.kind !== 'IMAGE_DATA') return;
      const imageData = new ImageData(e.data.memoryView, e.data.width, e.data.height, {});
      const canvas = document.querySelector('canvas')
      canvas.width = e.data.width;
      canvas.height = e.data.height;
      const ctx = canvas.getContext('2d');

      ctx.putImageData(imageData, 0, 0)
    }
    </script>
  </body>
</html>
|
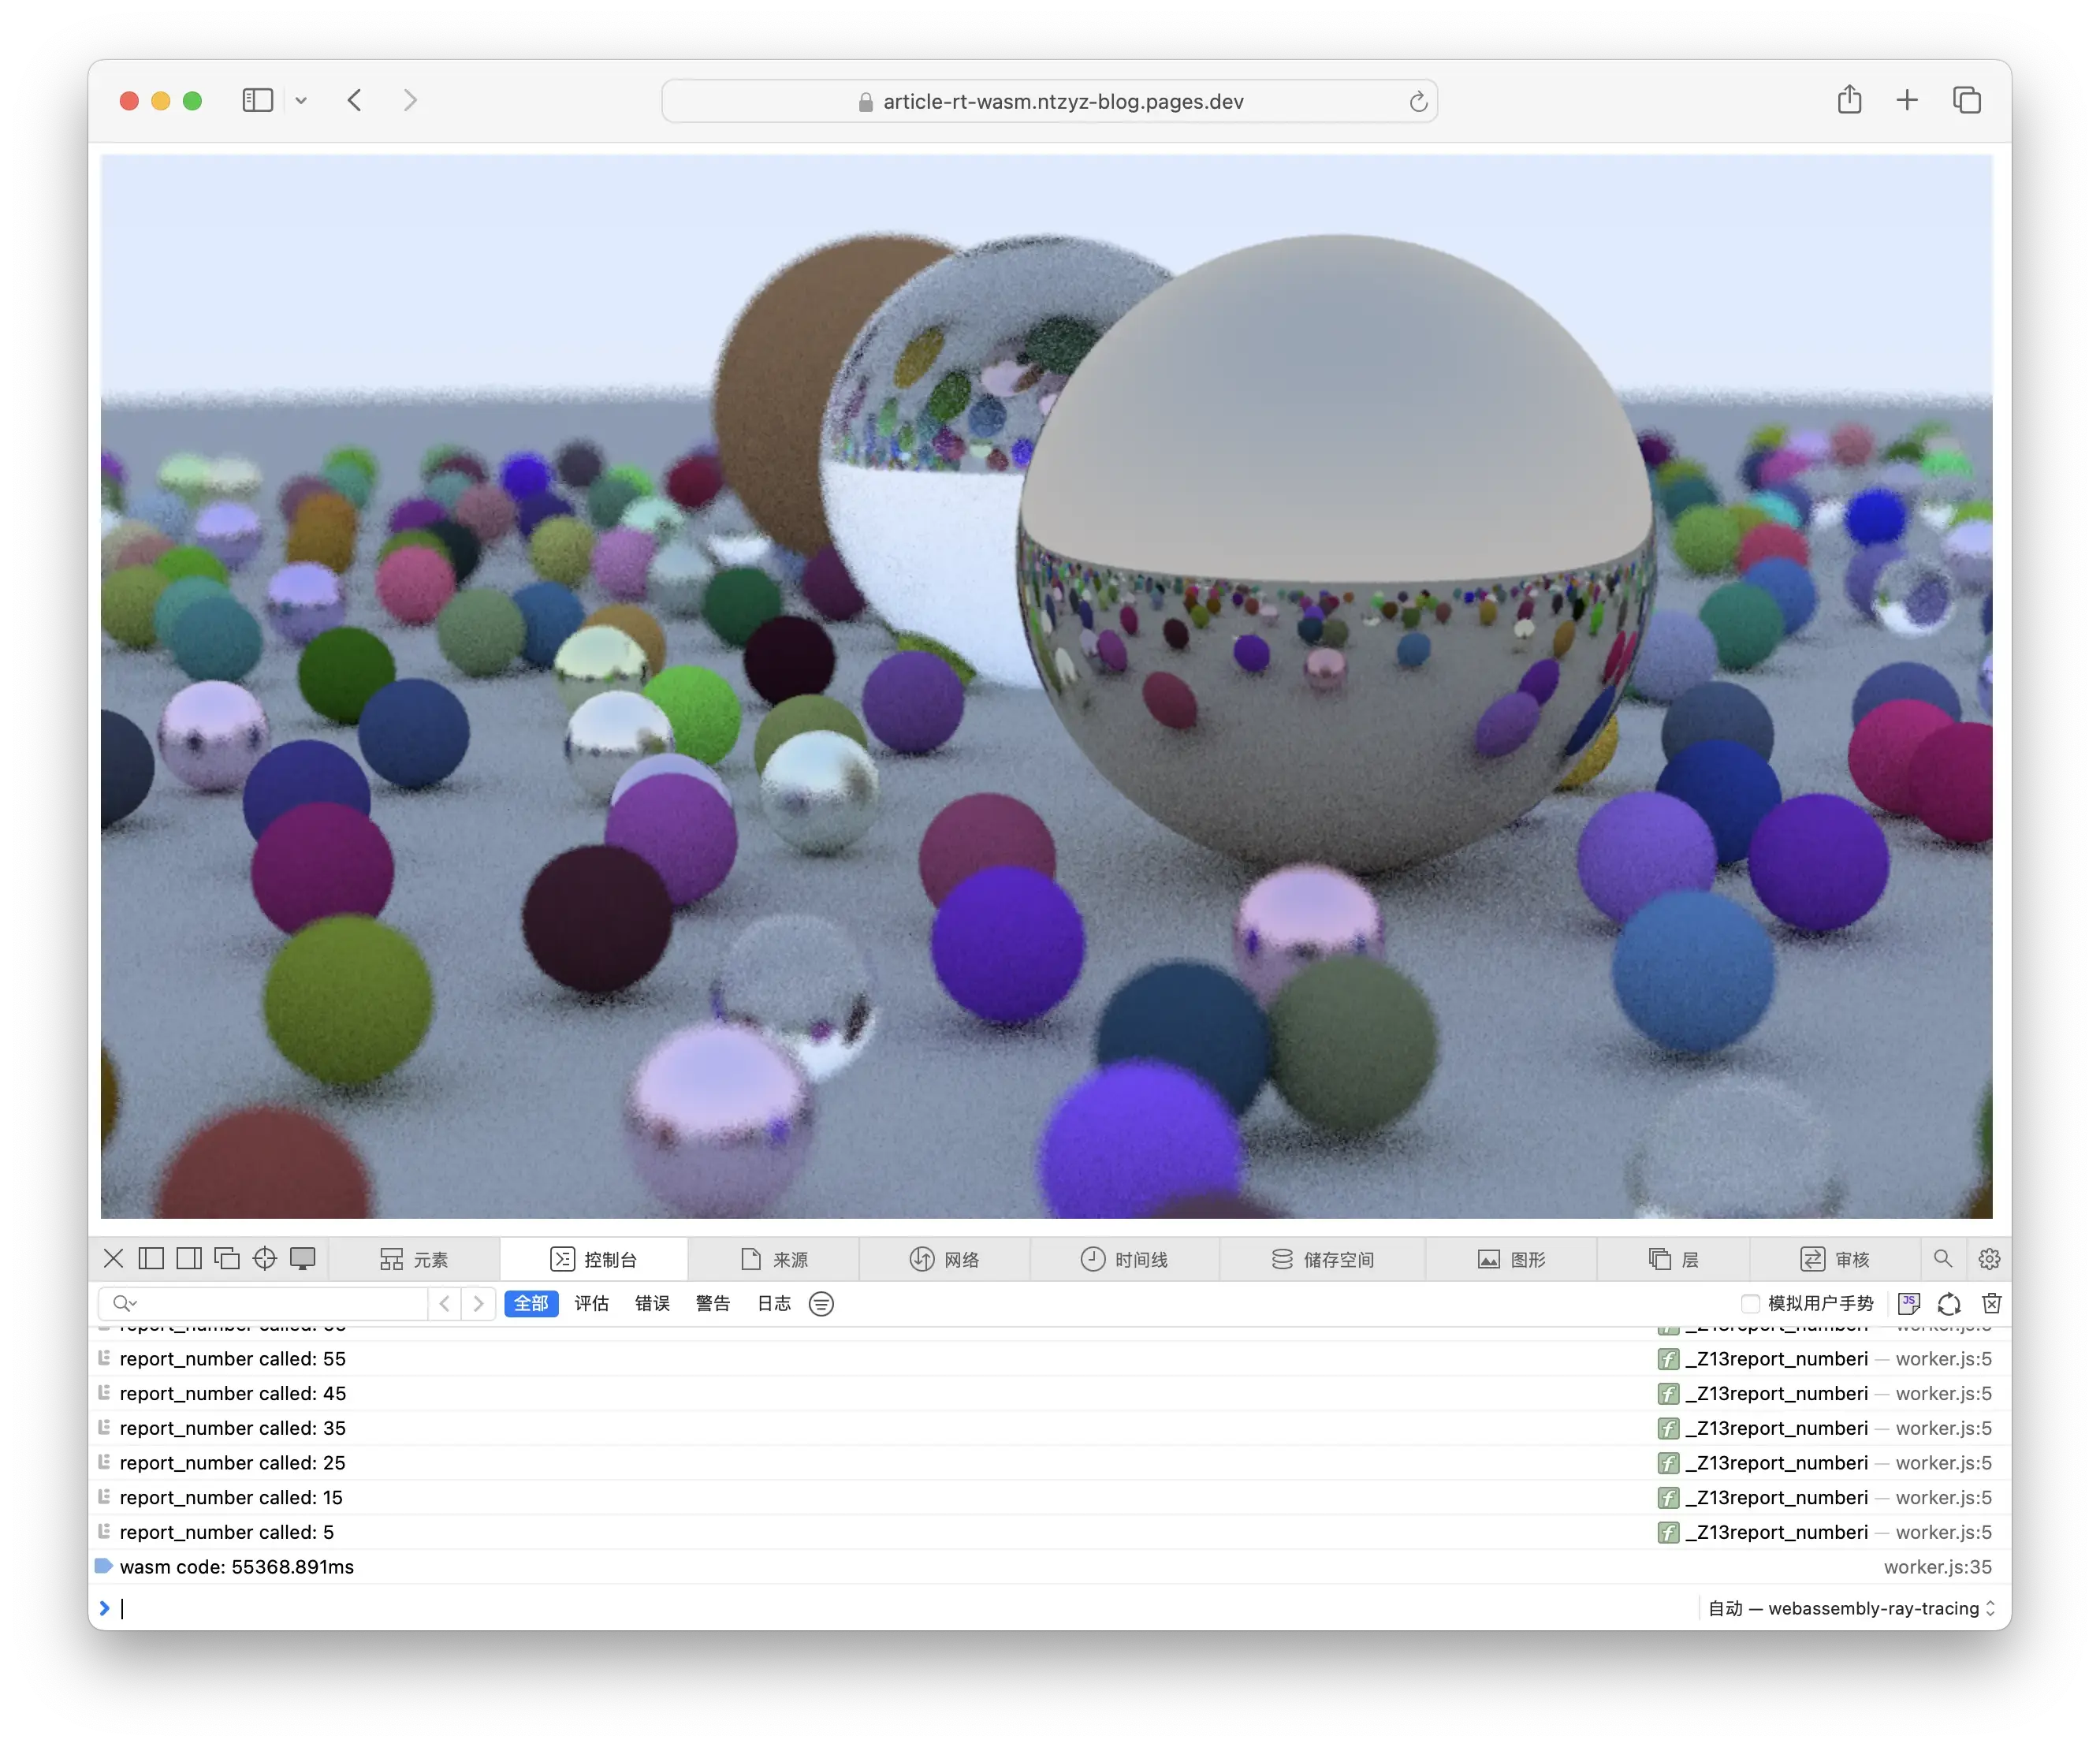
Try It Out Yourself
I’ve also put the artifacts on my own blog; you can directly open this link to check out the result!