HomeLab
Load NVMe Driver in UEFI Shell
Linux
Collect Server Network Traffic with Multiple IPs on one same interface
Linux
Linux Desktop on Dual Monitor with Different DPI
Solution for Internet Connection Sharing Broken after Reboot on Windows 10
Migrate to Walkman From NetEase Cloud Music
Web Development
Decode and playback MP3 in web browser using Web Assembly
Linux
Create Linux Container with systemd-nspawn
Linux
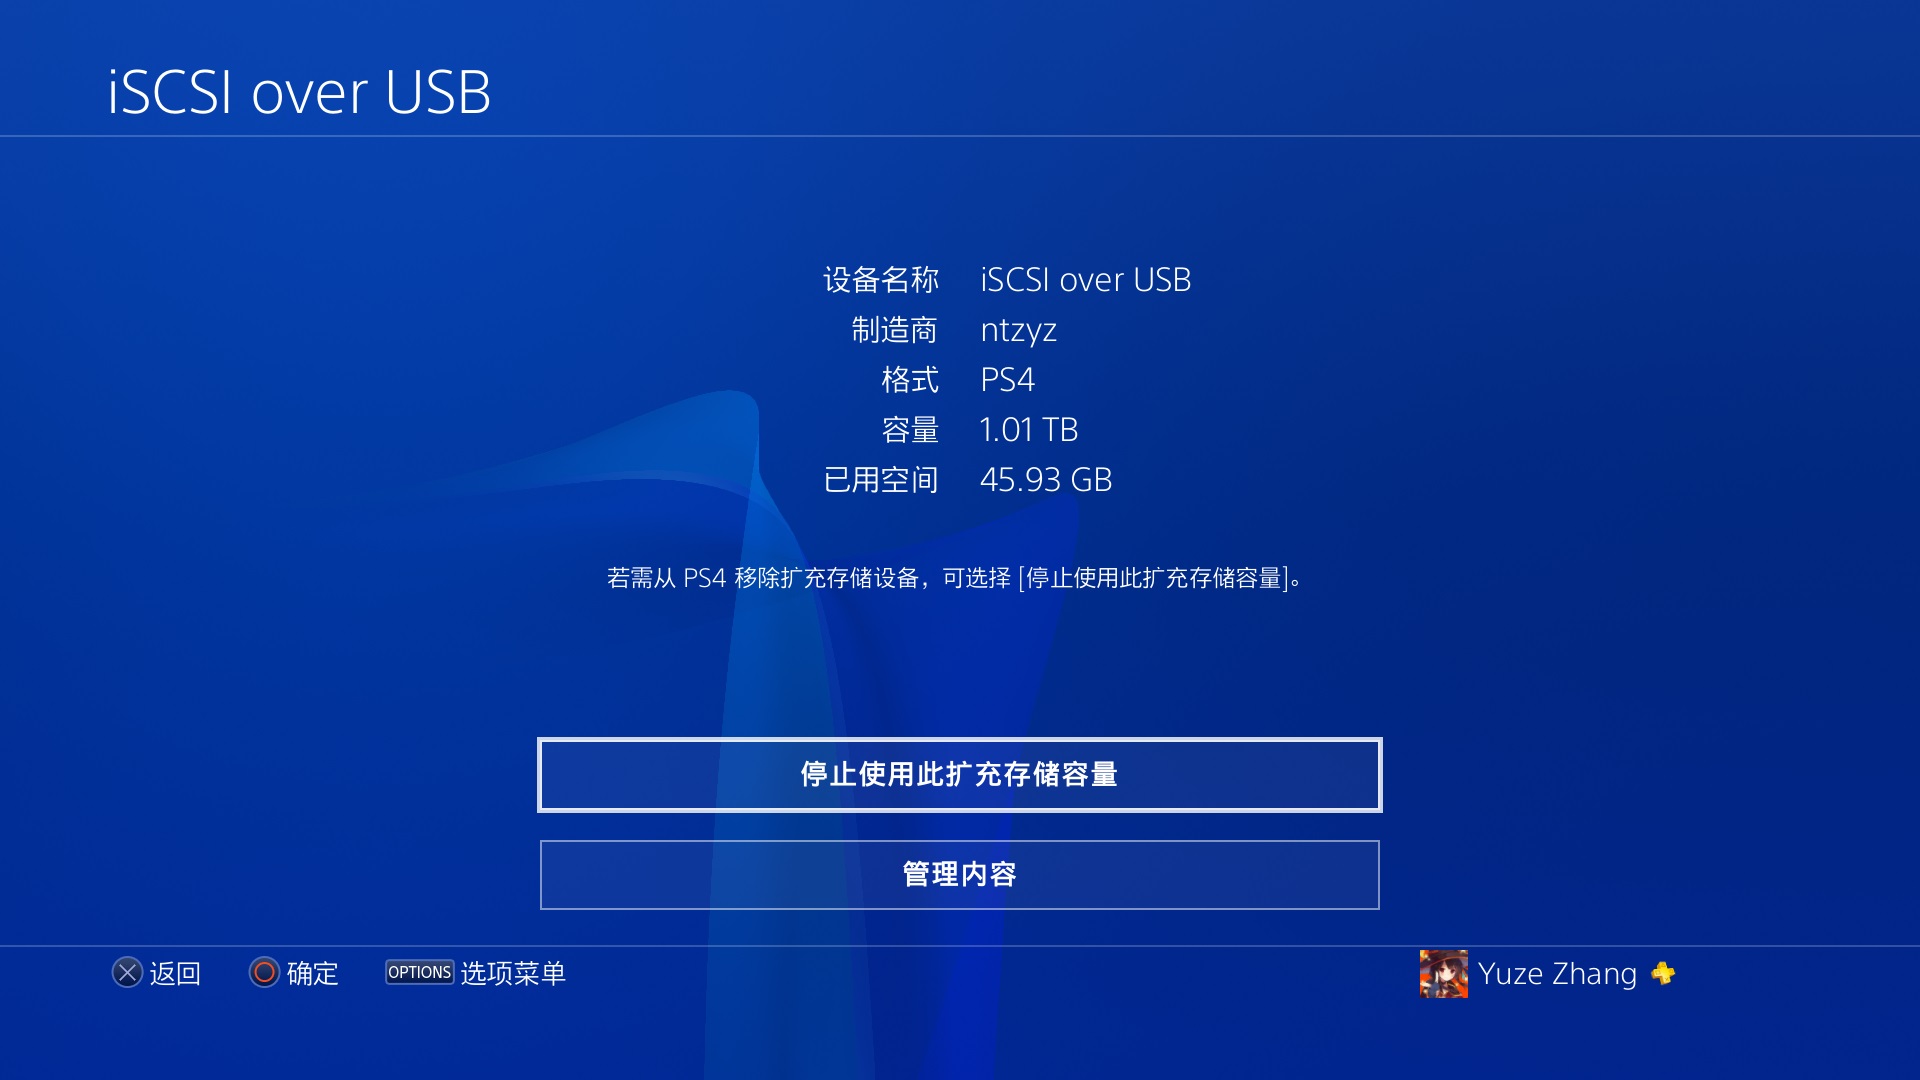
Extend Storage with iSCSI and USB Gadget for Your PS4
Linux
Fix HiDPI issue for Netease Cloud Music
Web Development
Linux
Implementing a Web Terminal
1
2
3